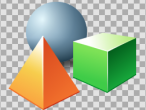


My first 3D project: A simple table


This table is consisted of 5 objects. The table top is a scaled box (cube). The four legs are scaled cans (cylinder).
To make this table, I carefully walked the turtle to the location where the objects should be placed and rotate the turtle to face certain direction before I place the objects. To move the turtle, I use the Quick Command Window to try first, and eventually I wrote in the Logo Editor Window the following commands to create this table.
If you are new to VRMath2 and LOGO, the above program can be difficult to understand. But in fact, they are very straight forward language once you learn those commands.
For example, the setscale is a command that change the scale of the object being created. setscale takes 3 inputs for x, y and z dimensions. The following commands SETDC to SETTR are material commands to specify the material settings of the object being created. Then the box command will create a box in the 3D space with the scale and material settings before it.
Next, I also tried and found the scale and material for the cylindric table legs. To find them, I utilised the Property Inspector Window's Transform Editor and Material Chooser to help. The material settings can be easily inserted into Logo Editor with a click of an icon in the Logo Editor Window.
Then the most difficult step is to move the turtle to the right location before creating the cylindric legs. To do so, I choose egocentric commands for a special purpose. Egocentric commands are those moving commands that are always referred to the turtle's location and orientation. To understand what will happen when using these commands, you need to imagine that you are the turtle or at least know where the turtle is and which direction the turtle is facing.
For example, the commands lt 90 fd 0.8 rt 90 will make the turtle to Left Turn 90 degrees, ForwarD 0.8 meter, and Right Turn 90 degrees.
There are some other commands that I have not explained, but I think that you can figure out. You can also read the documentation in Wiki if you want to learn more LOGO commands.
PS: I also applied a wood texture onto the table top. You can do it easily by simply select the table top (click on it), then select a texture in Texture Chooser in Property Inspector Window.
Have fun! :-)
Files: table.x3d, table.logo,
- Andy's blog
- Login or register to post comments
- 11011 reads