


mushroom forest


This is my fantasy- living in a forest filled with giant mushrooms lol
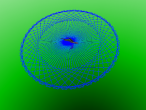
I created the mushrooms by moving the turtle around the page using the green arrows. once i had placed the turtle where i wanted it i clicked on insert a dish icon. Directly after this i chose insert a cone, and this created the stem. Once i had completed these two moves i moved the turtle to a new space and repeated these steps. once all the mushrooms were formed i clicked on TC which is located above the colour choices.
This showed me a series of textures such as bricks. I clicked on brick and wall and this brought a drop down menu out and i chose colour and pattern. from this i selected each component of the mushrooms individually and then chose a pattern to overlay on the selected image. i then clicked on shortcut which brought out a drop down menu from which i chose background. I then chose texture and meadow 2 to create the background. The final step was to choose a perspective to display and to take a screenshot. I thoroughly enjoyed creating this simple image and i am definitely going to elaborate on this to create some more designs.
Enjoy the mushrooms forest below. 
- Laura L's blog
- Login or register to post comments
- 7032 reads


Comments
Bravo
The mushroom forest is now uploaded..
Mushrooms - mush mush
By looking at the photo is already fasnating .... Really hope that you can include the actual 3D mushroom forest world for us to walk in.
After you have created the world, you can Save World as .vrm file. The .vrm file can be opened later to edit. For blog, you can Publish World as .x3d file. The .x3d file can be displayed on your blog. Check out this page to know how to do it. https://vrmath2.net/content/how-write-blog
There are two videos in the above link. You can start from 9'50'' in the first video.